
MongoDB 데이터베이스 사용하기
스키마 정의하기
• 스키마는 다룰 객체의 틀을 제공한다
• 모델은 스키마를 기반으로해서 객체를 생성,조회,수정,삭제할 수 있다
import mongoose from "mongoose";

const TaskSchema = new mongoose.Schema(
    {
        title:{
            type:String,
        },
        description: {
            type:String,
        },
        isComplete: {
            type: Boolean,
            default: false,
        },

    },
    {
        timestamps:true,

    },
);

const Task=mongoose.model('Task',TaskSchema); //tasks라는 컬렉션에 데이터를 추가하고 수정한다

export default Task; //생성한 모델을 export한다
model의 첫번째 아규먼트는 첫글자를 대문자이고 단수형이다
예) Subscription 스키마 정의하기
import mongoose from 'mongoose';

const SubscriptionSchema = new mongoose.Schema(
  {
    name: {
      type: String,
    },
    price: {
      type: Number,
    },
    cycle: {
      type: String,
    },
    firstPaymentDate: {
      type: Date,
    },
    memo: {
      type: String,
    },
  },
  {
    timestamps: true,
  }
);

const Subscription = mongoose.model('Subscription', SubscriptionSchema);

export default Subscription;
시드 데이터 넣기
import mongoose from "mongoose";
import data from './mock.js';
import Task from '../models/Task.js'
import { DATABASE_URL } from "../env.js";

mongoose.connect(DATABASE_URL);

await Task.deleteMany({}); //삭제 조건을 파라미터로 받는다
await Task.insertMany(data); // 삽입할 데이터를 파라미터로 받는다

mongoose.connection.close(); // 커넥션을 종료해줘야한다
💡DB에 값을 쓰고 읽어오는 과정은 비동기로 처리된다 따라서 결과를 기다리면 await을 붙여야한다
* —v는mongooser가 문서를 관리할 때 내부적으로 사용하는 값
데이터 조회하기
변수를 한꺼번에 바꾸고 싶을 땐 마우스를 대고 f2를 누르면 전체수정이 가능하다
app.get('/tasks/:id', async(req,res)=>{
    const id= req.params.id;
    const task= await Task.findById(id);
    if(task){
        res.send(task);
    }else{
        res.status(404).send({message : 'Cannot find given id.'});
    }

});

---------------------------------
app.get('/tasks',async(req, res)=>{
/**
 * 쿼리 파라미터
 *  - sort: 'oldest'인 경우 오래된 테스트 기준, 나머지 경우 새로운 테스크 기준
 * -count: 테스크 개수
 */
const sort=req.query.sort;
const count=Number(req.query.count) || 0;

const sortOption={
    createdAt:sort ==='oldest'? 'asc':'desc'

};
const tasks = await Task.find().sort(sortOption).limit(count);

res.send(tasks);

});
• 함수 안에서 await을 사용하려면 함수 앞에 async를 붙여야한다
• Task.findById는 쿼리를 리턴 한다 (promise와 비슷하나 쿼리는 조회 조건을 계속 추가할 수 있다)
• find는 여러 객체를 가져온다
• count가 0인 경우 limit 메소드는 모든 객체를 리턴한다
💡여러 객체를 조회할 때는 .find(), 특정 id에 대한 객체를 조회할 때는 .findById()
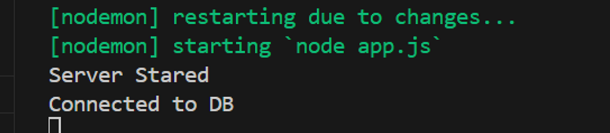
실행결과

쿼리 필터
Model.find() 메소드에 필터 객체를 전달하면 조건을 만족하는 데이터만 조회할 수 있다.
<persons라는 컬렉션에 아래와 같은 데이터가 있고 이를 다루는 Person 모델이 있다고 가정>
[
  {
    "_id": "645094e4670add1f1f973f68",
    "name": "James",
    "email": "james@gmail.com",
    "age": 26
  },
  {
    "_id": "645094e4670add1f1f973f67",
    "name": "Charlie",
    "email": "charlie@naver.com",
    "age": 30
  },
  {
    "_id": "645094e4670add1f1f973f66",
    "name": "Alice",
    "email": "alice@gmail.com",
    "age": 21
  },
  {
    "_id": "645094e4670add1f1f973f65",
    "name": "Paul",
    "email": "paul@naver.com",
    "age": 40
  },
  {
    "_id": "645094e4670add1f1f973f64",
    "name": "Hannah",
    "email": "hannah@gmail.com",
    "age": 34
  }
]
일치
가장 많이 사용하는 필터는 필드의 값이 특정 값과 일치하는지 확인하는 것
Person.find({ name: 'James' });
[
  {
    "_id": "645094e4670add1f1f973f68",
    "name": "James",
    "email": "james@gmail.com",
    "age": 26
  }
]
Person.find({ age: 21 });
[
  {
    "_id": "645094e4670add1f1f973f66",
    "name": "Alice",
    "email": "alice@gmail.com",
    "age": 21
  }
]
비교 연산자
필드가 특정 값을 초과하는지 확인하려면 $gt 연산자, 특정 값 미만인지 확인하려면 $lt 연산자를 사용할 수 있다. 연산자를 사용하는 경우 새로운 객체 안에 네스팅(nesting)한다.
*객체 내에 네스팅한다는 뜻은 객체 안에 다른 객체를 포함시키는 것
Person.find({ age: { $gt: 35 } });
[
  {
    "_id": "645094e4670add1f1f973f65",
    "name": "Paul",
    "email": "paul@naver.com",
    "age": 40
  }
]
Person.find({ age: { $lt: 35 } });
[
  {
    "_id": "645094e4670add1f1f973f68",
    "name": "James",
    "email": "james@gmail.com",
    "age": 26
  },
  {
    "_id": "645094e4670add1f1f973f67",
    "name": "Charlie",
    "email": "charlie@naver.com",
    "age": 30
  },
  {
    "_id": "645094e4670add1f1f973f66",
    "name": "Alice",
    "email": "alice@gmail.com",
    "age": 21
  },
  {
    "_id": "645094e4670add1f1f973f64",
    "name": "Hannah",
    "email": "hannah@gmail.com",
    "age": 34
  }
]
Regex 연산자
문자열 필드가 특정 패턴을 가지고 있는지 확인한다. $regex 연산자를 사용하면 된다.
Person.find({ email: { $regex: 'gmail\\.com$' } });
[
  {
    "_id": "645094e4670add1f1f973f68",
    "name": "James",
    "email": "james@gmail.com",
    "age": 26
  },
  {
    "_id": "645094e4670add1f1f973f66",
    "name": "Alice",
    "email": "alice@gmail.com",
    "age": 21
  },
  {
    "_id": "645094e4670add1f1f973f64",
    "name": "Hannah",
    "email": "hannah@gmail.com",
    "age": 34
  }
]
AND 연산자
여러 조건을 모두 만족하는 결과만 필터하고 싶다면 하나의 객체 안에 여러 조건을 작성하면 된다.
Person.find({ age: { $lt: 32 }, email: { $regex: 'gmail\\.com$' } });
[
  {
    "_id": "645094e4670add1f1f973f68",
    "name": "James",
    "email": "james@gmail.com",
    "age": 26
  },

  {
    "_id": "645094e4670add1f1f973f66",
    "name": "Alice",
    "email": "alice@gmail.com",
    "age": 21
  }
]
OR 연산자
여러 조건 중 하나라도 만족하는 결과를 필터 하고 싶다면 $or 연산자를 사용하면 된다
Person.find({ $or: [{ age: { $lt: 32 } }, { email: { $regex: 'gmail\\.com$' } }] });
[
  {
    "_id": "645094e4670add1f1f973f68",
    "name": "James",
    "email": "james@gmail.com",
    "age": 26
  },
  {
    "_id": "645094e4670add1f1f973f67",
    "name": "Charlie",
    "email": "charlie@naver.com",
    "age": 30
  },
  {
    "_id": "645094e4670add1f1f973f66",
    "name": "Alice",
    "email": "alice@gmail.com",
    "age": 21
  },
  {
    "_id": "645094e4670add1f1f973f64",
    "name": "Hannah",
    "email": "hannah@gmail.com",
    "age": 34
  }
]
.findOne() 메소드
만약 _id 대신 다른 조건을 만족하는 객체 하나를 가져오고 싶다면 .findOne() 메소드를 사용하면 된다.
조건을 만족하는 객체가 여러 개일 경우 처음으로 매칭된 객체 하나만 리턴한다.
Person.findOne({ name: 'James' });
{
  "_id": "645094e4670add1f1f973f68",
  "name": "James",
  "email": "james@gmail.com",
  "age": 26
}
Person.findOne({ email: { $regex: 'gmail\\.com$' } });
{
  "_id": "645094e4670add1f1f973f68",
  "name": "James",
  "email": "james@gmail.com",
  "age": 26
}
_id로 객체를 가져올 때는 .findById()를 사용하는 걸 추천
다른 조건에 해당하는 객체 하나를 가져와야 할 때 .findOne() 메소드를 사용하면 된다.
데이터 생성과 유효성 검사
app.post('/tasks', async(req,res)=>{
    const newTask= await Task.create(req.body);
    res.status(201).send(newTask);
});
validator: function(title){
	return title.split(' ').length >1;
	},
	message: 'Must contain at least 2 words',
	},

} // 유효성 검사
데이터베이스를 사용하여서 POST 했기 때문에 서버를 꺼도 사라지지 않는다
비동기 코드 오류 처리하기
서버가 아예 죽어버리는 경우도 있다
(id가 잘못됐을 때, 비동기 오류 등)
비동기 코드 오류 처리 방법 → 함수를 만든다
asyncHandler
function asyncHandler(handler) {
    return async function (req,res) {
        try{
            await handler(req,res);
        }catch(e){

            if (e.name === 'ValidationError') {
                res.status(400).send({ message: e.message });
                } else if (e.name === 'CastError') {
                res.status(404).send({ message: 'Cannot find given id.' });
                } else {
                res.status(500).send({ message: e.message });

                }
        }
    }
}
app.post('/tasks',asyncHandler(async(req,res)=>{
    const newTask= await Task.create(req.body);
    res.status(201).send(newTask);
}));
데이터 수정하고 삭제하기
patch 수정
app.patch('/tasks/:id', asyncHandler(async(req,res)=>{
    const id= req.params.id;
    const task= await Task.findById(id);
    if(task){
        Object.keys(req.body).forEach((key)=>{
            task[key]=req.body[key];
        });
        await task.save();
        res.send(task);
    }else{
        res.status(404).send({message : 'Cannot find given id.'});
    }

}));
• 기존에 있던 updatedAt은 mogodb가 처리해주기 때문에 지워도 된다
• 수정한 테스크를 저장하는 save 메소드를 호출한다
delete 수정
유효성 검사는 모델의 create나 save 메소드를 사용할 때만 실행된다
app.delete('/tasks/:id', asyncHandler(async(req,res)=>{
    const id= req.params.id;
    const task = await Task.findByIdAndDelete(id); //객체를 찾은 다음 삭제한다
    if(idx>=0){
        res.sendStatus(204);
    }else{
        res.status(404).send({message : 'Cannot find given id.'});
    }

}));
✍️요약 정리
MongoDB와 Mongoose
• MongoDB는 데이터를 문서 형태로 저장하는 데이터베이스. 데이터, 즉 문서 하나를 '도큐먼트'라고 부르고 도큐먼트의 모음을 '컬렉션'이라고 부른다
• Atlas 클러스터에서 데이터베이스를 생성하고 이에 대한 URL을 통해 접속하는 방법.
💡 자바스크립트 프로그램에서 MongoDB에 접속할 때는 Mongoose라는 라이브러리를 이용할 수 있다.
데이터베이스 접속
import mongoose from 'mongoose';

mongoose.connect('mongodb+srv://...');
• mongodb+srv://...은 Atlas에서 복사한 URL.
• 이런 URL은 별도의 파일이나 나중에 배울 환경 변수에 저장해 두는 것이 좋다.
스키마와 모델
• '스키마'는 데이터(도큐먼트)의 틀.
• 💡 이 스키마를 기반으로 데이터를 생성하고 조회하고 수정, 삭제할 수 있는 인터페이스를 '모델'이라고 함
• Mongoose로 어떤 데이터를 다루려면 항상 스키마와 모델을 가장 먼저 정의해야한다
models/Task.js
import mongoose from 'mongoose';

const TaskSchema = new mongoose.Schema(
  {
    title: {
      type: String,
      required: true,
      maxLength: 30,
    },
    description: {
      type: String,
    },
    isComplete: {
      type: Boolean,
      required: true,
      default: false,
    },
  },
  {
    timestamps: true,
  }
);

const Task = mongoose.model('Task', TaskSchema);

export default Task;
• 자주 사용하는 필드 타입은 String, Number, Boolean, Dat
`default` 프로퍼티로 기본값을 설정할 수 있다.
• id 필드는 정의하지 않아도 Mongoose가 알아서 관리한다.
• timestamps: true 옵션을 사용하면 createdAt, updatedAt 필드를 Mongoose가 알아서 생성하고 관리한다.
유효성 검사에 대한 정보도 스키마에 정의한다.
- required: 데이터를 생성할 때 꼭 있어야 하는 필드
- 문자열 필드: maxLength(최대 길이), minLength(최소 길이), enum(특정 값 중 하나여야 할 때), match(특정 패턴이어야 할 때)
- 숫자형 필드: min(최소), max(최대)
커스텀 Validator를 사용할 수도 있다
{
  title: {
    type: String,
    required: true,
    maxLength: 30,
    validate: {
       validator: function (title) {
         return title.split(' ').length > 1;
       },
       message: 'Must contain at least 2 words.',
     },
  },
  // ...
}
CRUD 연산
생성(Create)
• .create() 메소드를 사용해서 객체를 생성할 수 있다.
app.post('/tasks', async (req, res) => {
  const newTask = await Task.create(req.body);
  res.status(201).send(newTask);
});
💡모든 모델 메소드는 비동기로 실행되기 때문에 결과를 가져오려면 await을 사용해야 한다.
조회(Read)
• 여러 객체를 조회할 때는 .find() 메소드를 사용한다.
app.get('/tasks', async (req, res) => {
  const tasks = await Task.find();
  res.send(tasks);
});
• id로 특정 객체를 조회할 때는 .findById()를 사용한다.
app.get('/tasks/:id', async (req, res) => {
  const task = await Task.findById(req.params.id);
  res.send(task);
  } else {
    res.status(404).send({ message: 'Cannot find given id.' });
  }
});
• id 외에 다른 조건으로 필터를 하고 싶을 때는 쿼리 필터를 사용하면 된다
정렬과 개수 제한
• .find()는 쿼리를 리턴하기 때문에 뒤에 메소드를 체이닝(chaining)할 수 있다.
• 자주 체이닝하는 메소드는 정렬 메소드인 .sort()와 개수 제한 메소드인 .limit()
app.get('/tasks', async (req, res) => {
    /** 쿼리 파라미터
     *  - sort: 'oldest'인 경우 오래된 태스크 기준, 나머지 경우 새로운 태스크 기준
     *  - count: 태스크 개수
     */
    const sort = req.query.sort;
    const count = Number(req.query.count) || 0;

    const sortOption = { createdAt: sort === 'oldest' ? 'asc' : 'desc' };
    const tasks = await Task.find().sort(sortOption).limit(count);

    res.send(tasks);
  })
);
수정(Update)
• 객체를 가져온 후 필드를 수정하고 .save()를 호출하면 된다
app.patch('/tasks/:id', async (req, res) => {
  const task = await Task.findById(req.params.id);
  if (task) {
    Object.keys(req.body).forEach((key) => {
      task[key] = req.body[key];
    });
    await task.save();
    res.send(task);
  } else {
    res.status(404).send({ message: 'Cannot find given id.' });
  }
});
삭제(Delete)
• .findByIdAndDelete() 메소드를 이용해서 객체를 가져오는 것과 동시에 객체를 삭제할 수 있다.
app.delete('/tasks/:id', async (req, res) => {
  const task = await Task.findByIdAndDelete(req.params.id);
  if (task) {
    res.sendStatus(204);
  } else {
    res.status(404).send({ message: 'Cannot find given id.' });
  }
});
비동기 오류
• 비동기 코드에서 오류가 나면 서버가 죽기 때문에 이를 따로 처리해 줘야한다.
• 모든 핸들러를 감싸는 asyncHandler() 같은 함수를 정의하고 안에서 try, catch 문을 활용할 수 있다.
function asyncHandler(handler) {
  return async function (req, res) {
    try {
      await handler(req, res);
    } catch (e) {
      // e.name(오류 이름), e.message(오류 메시지) 이용해서 오류 처리
    }
  };
}

// ...

app.get('/tasks', asyncHandler(async (req, res) => { ... }));
'{Extracurricular Activities} > Codeit Boost-Node.js' 카테고리의 다른 글
| 6주차 스터디 관계형 데이터베이스를 활용한 자바스크립트 서버 만들기(2) [코드잇 부스트 백엔드 스터디] (3) | 2024.07.03 |
|---|---|
| 6주차 스터디 관계형 데이터베이스를 활용한 자바스크립트 서버 만들기(1) [코드잇 부스트 백엔드 스터디] (1) | 2024.07.03 |
| 6주차 스터디 자바스크립트 백엔드 개발 (1) [코드잇 부스트 백엔드 스터디] (0) | 2024.06.28 |
| 5주차 스터디 자바스크립트 웹 개발 기본기 (4) async/await을 활용한 세련된 비동기 코드 [코드잇 부스트 백엔드 스터디 ] (2) | 2024.06.04 |
| 5주차 스터디 자바스크립트 웹 개발 기본기 (3) 비동기 실행과 Promise 객체 [코드잇 부스트 백엔드 스터디 ] (2) | 2024.06.04 |


